Understanding the rendering options in Home Designer Suite sets the stage for a deep dive into the intricate world of visual design software. This suite offers a variety of rendering techniques, each tailored to suit different project needs, whether you’re crafting a detailed floor plan or a stunning 3D model. By grasping these options, one can enhance the overall presentation and functionality of home design projects, making them not only visually appealing but also practical in execution.
In this discussion, we will explore the diverse rendering options available, the steps to create breathtaking 3D renderings, and the essential differences between 2D and 3D renderings. We will also provide handy troubleshooting tips to ensure that your rendering experience is as smooth as possible, thus empowering you to make the most of the Home Designer Suite.
Overview of Rendering Options
Rendering options in Home Designer Suite provide users with various methods to visualise their projects, enhancing the design process. Each option serves a distinct purpose, catering to different needs based on the project’s complexity, the desired visual effect, and the tools available. Understanding these options is crucial for selecting the most appropriate rendering style to effectively communicate design ideas.
There are several rendering options available in Home Designer Suite, each with unique attributes that cater to different project requirements. The primary rendering types include 2D Display, 3D Wireframe, 3D Rendered View, and Photorealistic Rendering. Each of these options plays a significant role in visual representation, whether for preliminary sketches or final presentations.
2D Display
The 2D Display rendering option provides a straightforward view of the project, enabling users to focus on the layout and design elements without the distraction of three-dimensional effects. This option is particularly useful during the initial design phase, allowing for quick modifications and assessments.
3D Wireframe
The 3D Wireframe rendering option offers a skeletal framework of the design, showcasing the structural components without textures or colours. This rendering type is beneficial for architectural professionals who wish to examine spatial relationships and dimensions in a three-dimensional space.
3D Rendered View, Understanding the rendering options in Home Designer Suite
The 3D Rendered View enhances the design by adding basic materials and colours, creating a more realistic depiction without full photorealism. This rendering option is ideal for client presentations where a more dynamic visual representation is required, while still allowing for design adjustments.
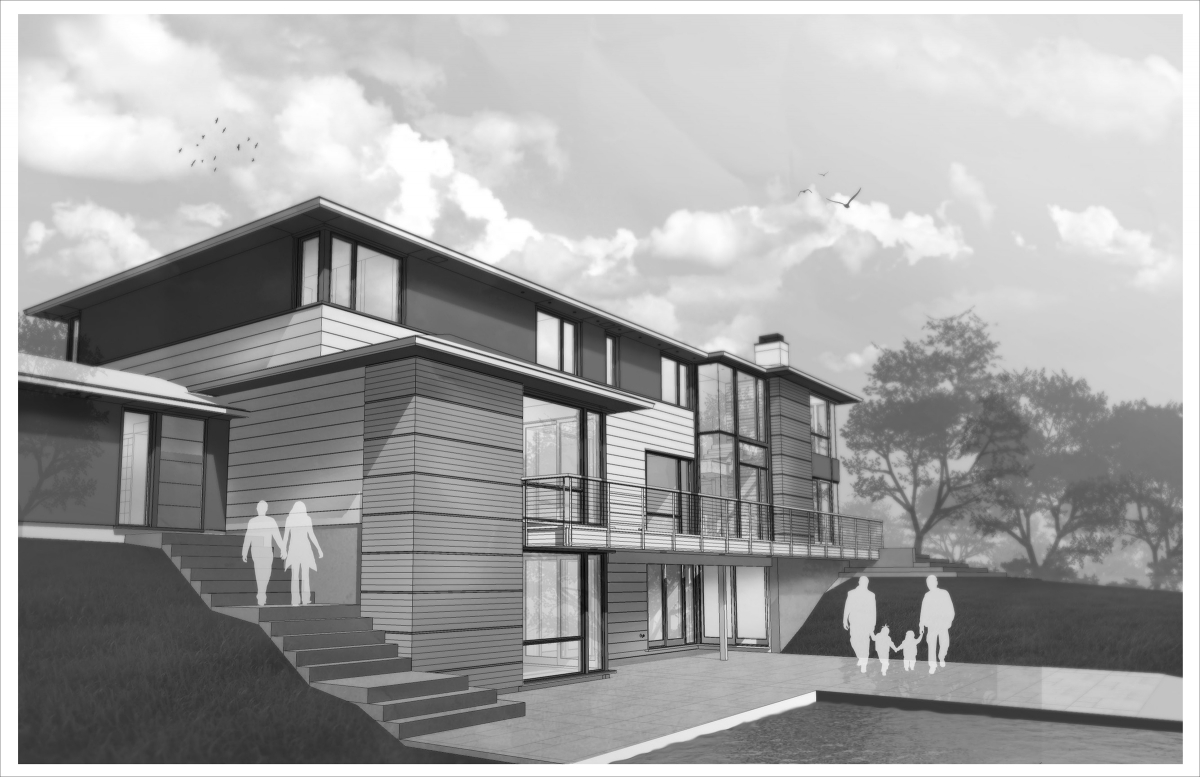
Photorealistic Rendering
Photorealistic Rendering delivers the highest level of detail and realism, simulating lighting, shadows, and textures to create a lifelike representation of the design. This option is perfect for final project presentations or marketing materials, as it effectively communicates the atmosphere and aesthetics of the proposed space. For instance, showcasing a residential property for sale can greatly benefit from this rendering type, as it attracts potential buyers with an appealing visual representation.
Application of Rendering Options
Each rendering type has its optimal use case, and understanding these applications can significantly enhance the design workflow. Here are some scenarios where specific rendering options excel:
- 2D Display: Ideal for early-stage design work, such as floor plans and layout adjustments.
- 3D Wireframe: Useful for structural analysis and understanding spatial relationships in complex designs.
- 3D Rendered View: Appropriate for client meetings where feedback is needed on design elements while maintaining flexibility.
- Photorealistic Rendering: Best suited for final presentations and promotional materials, showcasing the design in the most appealing light.
Understanding the strengths of each rendering option allows designers to choose the most effective visualisation method, enhancing communication and decision-making throughout the design process.
3D Rendering Techniques
Creating realistic 3D renderings in Home Designer Suite is a multifaceted process that combines artistic vision with technical know-how. The right techniques, paired with suitable tools and settings, can vastly enhance the quality and realism of your visual presentations. Below, we delve into the steps necessary for achieving compelling 3D renderings, while also examining key tools and settings that play a pivotal role in this endeavour.
Steps to Create Realistic 3D Renderings
To achieve high-quality 3D renderings, it is essential to follow a structured approach. This involves several steps that ensure both accuracy and visual appeal.
- Initial Design Setup: Begin with a well-detailed model that accurately represents your design intentions. Ensure that dimensions, layouts, and features are all precisely aligned.
- Material Application: Apply realistic materials to surfaces. Home Designer Suite offers a variety of textures and finishes that mimic real-world materials such as wood, stone, and metal.
- Lighting Configuration: Experiment with different lighting options. Natural light, artificial light, and ambient lighting all contribute to the realism of your renderings.
- Camera Angles: Set up the camera to capture your design from engaging viewpoints. Adjust the field of view and perspective to enhance the visual narrative.
- Rendering Settings: Select the desired rendering quality and resolution within the software settings. Higher quality settings may take longer to process but yield superior results.
- Post-Processing: After rendering, utilise image editing tools to enhance the final output. Adjust brightness, contrast, and saturation to achieve the desired look.
Common Tools and Settings for Enhancing 3D Renderings
Utilising the right tools and settings is fundamental to elevating the quality of 3D renderings. The following components are essential for creating visually compelling images.
The software includes various features that facilitate the enhancement of 3D outputs. Familiarity with these can significantly improve rendering quality.
- Texture Editor: This tool allows you to customise textures for surfaces, ensuring that they reflect the correct material properties.
- Lighting Tools: Functions such as sun position settings and artificial lighting adjustments can create dynamic and realistic lighting scenarios.
- Rendering Styles: Different rendering styles available, such as sketch mode or photorealistic mode, can profoundly affect the overall aesthetic.
- Scene Editor: This feature enables the adjustment of environment settings, including shadows and reflections, which add depth to the renderings.
- Camera Controls: Advanced camera settings allow for manipulation of focus, depth of field, and perspective, enhancing the visual appeal.
Effects of Lighting and Material Settings on 3D Renderings
The interplay between lighting and material settings is crucial for achieving realistic 3D renderings. Variations in these elements can dramatically alter the final output.
Understanding how different settings affect renderings can guide designers in making informed choices that enhance visual representation.
“Lighting is the lifeblood of any 3D scene; without it, even the best materials cannot shine.”
The following aspects should be considered:
- Natural Lighting: Utilising daylight can create soft shadows and highlights, making spaces feel more inviting. Adjusting the sun’s angle can evoke different moods throughout the day.
- Artificial Lighting: Choosing between different light sources (e.g., warm vs. cool lights) influences the ambience of the scene. Layering various light types can achieve a more complex and realistic environment.
- Material Properties: The shininess, reflectivity, and translucence of materials can interact with lighting to create realistic effects, such as gloss on polished surfaces or translucency in glass.
- Shadow Depth: Shadows can accentuate the realism of a scene. Adjusting shadow softness and intensity can add dimension, helping to ground objects within their environment.
- Reflection and Refraction: Materials such as water and glass require careful tuning of reflection and refraction settings to achieve authenticity in rendering.
2D vs. 3D Renderings: Understanding The Rendering Options In Home Designer Suite
In the realm of design and architecture, the choice between 2D and 3D renderings in Home Designer Suite plays a pivotal role in how ideas and concepts are communicated. Each style offers distinct advantages and serves different purposes within the planning and visualisation phases of design projects. By understanding these differences, designers can effectively choose the right type of rendering to present their visions clearly and concisely.
The key differences between 2D and 3D renderings revolve around the level of detail and perspective each provides. 2D renderings display flat, two-dimensional representations of spaces, focusing primarily on layout and proportions. In contrast, 3D renderings offer a more immersive view, allowing for a comprehensive understanding of depth, texture, and lighting. This dimensionality enhances the viewer’s experience, providing a more realistic portrayal of the intended design.
Advantages of 2D Renderings for Floor Plans and Layouts
2D renderings excel in conveying essential information regarding spatial relationships and layout configurations without the complexity that 3D models entail. This simplicity is particularly beneficial during the initial stages of design, where clarity and precision are paramount. The following points highlight some of the advantages of utilising 2D renderings:
– Simplicity and Clarity: 2D drawings are straightforward, allowing for easy comprehension of the layout. This is crucial for clients who need to grasp the foundational concepts quickly.
– Focus on Measurements: Accurate measurements are vital in architectural design, and 2D renderings facilitate direct representation of dimensions, making it easier to assess space and flow.
– Quick Modifications: Alterations to layouts can be made rapidly without the need to manipulate complex 3D models, streamlining the design process.
– Cost-Effectiveness: Creating 2D renderings typically requires less time and resources compared to 3D modelling, which can lower project costs, particularly for preliminary designs.
In various scenarios, 2D renderings prove to be more beneficial than their 3D counterparts. The following table Artikels specific situations where opting for a 2D rendering is advantageous:
| Scenario | Reason for Preference |
|---|---|
| Initial Floor Plan Development | Provides a clear layout without distraction from decorative elements. |
| Client Presentations for Concept Approval | Simplifies communication of design intent, facilitating easier understanding. |
| Building Code Compliance Review | Ensures all measurements and layouts are clearly displayed for regulatory assessment. |
| Functional Space Planning | Encourages focus on room sizes and arrangements without visual clutter. |
| Budgeting and Cost Estimation | Facilitates straightforward calculation of areas and material requirements. |
Troubleshooting Rendering Issues
Rendering in Home Designer Suite can occasionally present challenges that may impede progress. Understanding how to troubleshoot these issues is essential for a smooth design experience. This section aims to equip you with a systematic approach to resolving rendering problems, enhancing performance, and ensuring output quality.
Checklist for Resolving Common Rendering Issues
Maintaining an efficient workflow in Home Designer Suite necessitates a clear process for addressing rendering issues. Below is a checklist that can guide users through the troubleshooting process.
- Ensure that all software updates are installed; outdated software may lead to rendering glitches.
- Verify that your project settings are correctly configured, including resolution and rendering quality.
- Check for any missing textures or files that may affect the rendering output.
- Review the lighting settings to ensure they are appropriately adjusted for the scene.
- Examine the graphics card settings; ensure they are optimally configured for rendering tasks.
- Restart the software and your computer to clear any temporary issues that may affect performance.
- Consult the Home Designer Suite user forums for advice on persistent issues from the community.
Impact of Computer Specifications on Rendering Performance
The performance of rendering operations in Home Designer Suite is significantly influenced by the specifications of your computer. Key elements, such as the CPU, RAM, and GPU, play a critical role in determining how efficiently rendering tasks are executed.
High-performance CPUs are capable of processing complex calculations more swiftly, which is particularly beneficial for intricate designs. A minimum of 8GB RAM is recommended for smooth operation; however, more demanding projects may require 16GB or higher to prevent lagging. Additionally, a robust GPU can dramatically enhance rendering speeds, particularly for 3D visuals, as it handles graphics computations more effectively than the CPU alone.
“A powerful computer is not merely an aid; it is a necessity for timely and quality-rendered outputs.”
Optimising Render Settings for Faster Results
Adjusting render settings can significantly improve your output speed without compromising quality. Users can employ several strategies to enhance performance.
Firstly, adjusting the rendering quality settings to a lower level during initial drafts can save time. This allows for quicker iterations, focusing on design adjustments before finalising details. Secondly, employing the “draft” mode can expedite rendering for preliminary evaluations, where quality is less critical.
Another useful tip is to limit the number of light sources and complex materials in scenes during the early phases of development. Fewer elements allow for quicker renders, enabling a more efficient workflow. Finally, consider closing unnecessary applications that may consume system resources, ensuring that Home Designer Suite has optimal access to your computer’s capabilities.
By implementing these strategies, users will find that rendering processes become more efficient, thereby enhancing overall productivity and satisfaction with their design projects.
When embarking on the journey of designing your space, understanding how to import custom objects in Home Designer Suite can greatly enhance your experience. Tailoring your design with unique elements not only reflects your style but can also elevate the overall aesthetic of your project.
In the realm of Home Designer Suite, it is equally crucial to be aware of common mistakes to avoid in Home Designer Suite. Familiarising yourself with these pitfalls can save you time and frustration, ensuring that your design process is both efficient and enjoyable.